Introduction
Letter Carving Stone PDF represents one of humanity’s most enduring art forms, transforming ordinary rock into timeless monuments that speak across centuries. From ancient Roman inscriptions to modern memorial stones, carved letters have preserved our most important messages in the most permanent medium available.
This comprehensive guide will walk you through everything you need to know about stone letter carving, providing you with the knowledge and techniques to create beautiful, lasting inscriptions. Whether you’re interested in memorial work, artistic expression, or historical crafts, stone carving offers a deeply satisfying creative outlet that connects you to thousands of years of human tradition.
By the end of this guide, you’ll understand the tools, techniques, and safety considerations needed to begin your stone carving journey. You’ll learn how to select appropriate stones, design effective layouts, and execute clean, professional-looking letters that will endure for generations.
What is Letter Carving on Stone
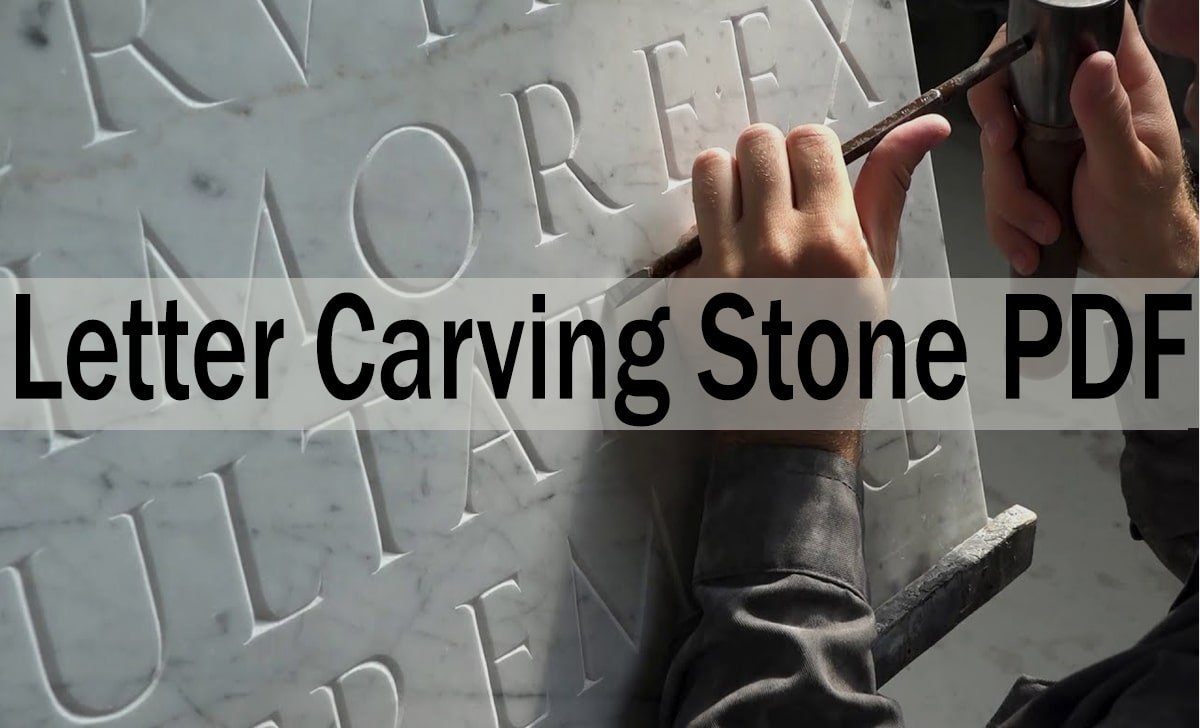
Letter Carving Stone PDF involves cutting letters, numbers, and symbols into various types of stone using specialized tools and techniques. This ancient craft combines artistic skill with technical precision to create permanent inscriptions for memorials, architectural elements, signs, and artistic pieces.
The process involves removing material from the stone’s surface to create recessed letters, known as incised carving. This technique differs from relief carving, where letters are raised above the surface. Incised carving is generally more durable and easier for beginners to master.
Traditional stone carving relies on hand tools and physical techniques passed down through generations. Modern carvers may also use pneumatic tools and diamond-tipped equipment, but the fundamental principles remain unchanged. The goal is always to create clean, readable letters that enhance the stone’s natural beauty while serving their intended purpose.
Different stone types require varying approaches. Soft stones like limestone and sandstone carve easily but may lack durability. Harder stones such as granite and slate offer superior longevity but demand more skill and stronger tools. Understanding these material properties is crucial for successful carving projects.
Tools and Materials Needed
Essential Hand Tools
The foundation of any stone carving toolkit starts with properly shaped chisels. Flat chisels, ranging from 1/4 inch to 1 inch wide, handle most letter cutting tasks. V-shaped chisels excel at creating serif details and decorative elements. Point chisels help establish letter outlines and remove larger amounts of material.
Mallets provide the controlled force needed for precise cutting. Traditional wooden mallets offer good control and reduce hand fatigue. Rubber mallets work well for lighter work and finishing touches. The weight should match your strength and the stone’s hardness.
Measuring and marking tools ensure accurate letter placement. Steel rulers, dividers, and squares help create consistent spacing and alignment. Pencils or chalk mark cutting lines, while carbon paper transfers complex designs onto the stone surface.
Power Tools and Modern Equipment
Pneumatic tools significantly speed up the carving process for larger projects. Air-powered chisels reduce physical strain and allow for more precise control. However, they require compressors and proper ventilation due to dust production.
Diamond-tipped tools cut through the hardest stones efficiently. These specialized tools maintain sharp edges longer than traditional steel implements but come at a higher cost. They’re particularly valuable for detailed work on granite and other challenging materials.
Angle grinders equipped with diamond blades can remove material quickly for rough shaping. They’re useful for creating initial letter outlines but require careful control to avoid overcutting.
Stone Selection
Choosing the right stone affects both the carving process and final appearance. Limestone offers excellent workability for beginners, carving smoothly with standard tools. Its light color provides good contrast for painted letters.
Sandstone varies widely in hardness and color options. Fine-grained varieties carve cleanly, while coarse textures can be challenging for detailed work. The natural colors range from cream to deep red.
Slate provides a smooth, dark surface ideal for precise lettering. Its layered structure requires careful tool angles to prevent splitting. The natural cleavage planes can be used creatively in design.
Granite represents the premium choice for permanent installations. Its extreme hardness demands specialized tools and techniques but rewards the carver with unmatched durability and polish potential.
Step-by-Step Carving Process
Design and Layout
Begin every project with careful planning and design work. Sketch your intended inscription on paper first, considering letter sizes, spacing, and overall composition. This preliminary work saves time and prevents costly mistakes during carving.
Transfer the approved design to the stone surface using carbon paper or by creating a paper template. Mark the baseline and any guide lines needed for consistent letter height. Double-check spelling and spacing before making any cuts.
Consider the stone’s natural features during layout planning. Work around existing cracks or color variations, incorporating them into your design when possible. Orient letters to follow the stone’s natural grain for easier carving.
Roughing Out Letters
Start carving by establishing the basic letter shapes with a point chisel and mallet. Work along the marked outlines, creating a shallow groove that defines each letter’s boundaries. This initial pass should be light, removing only small amounts of material.
Progress systematically from left to right to avoid accidentally damaging completed letters. Keep tools sharp throughout the process, as dull chisels require more force and provide less control.
Maintain consistent depth across all letters during this rough shaping phase. Use a depth gauge or marked chisel to ensure uniformity. Letters should typically be carved to a depth of 1/8 to 1/4 inch, depending on the stone type and intended viewing distance.
Refining Letter Forms
Switch to flat chisels for refining letter shapes and cleaning up rough edges. Work carefully along letter boundaries, creating clean, straight lines where appropriate. Curved letters require patience and multiple light passes to achieve smooth profiles.
Pay special attention to letter spacing and alignment during this phase. Minor adjustments can significantly improve the overall appearance. Use measuring tools frequently to maintain consistent proportions.
Develop a steady rhythm while carving, allowing the tools to do the work rather than forcing cuts. This approach produces cleaner results and reduces the risk of tool slippage or stone damage.
Final Detailing
Complete each letter by refining all interior spaces and adding any serif details or decorative elements. V-chisels excel at creating sharp corners and fine lines. Work slowly during this phase, as mistakes are difficult to correct.
Sand carved surfaces lightly to remove tool marks while preserving the crisp edges. Start with coarse grits and progress to finer abrasives. Some carvers prefer to leave subtle tool marks for added character.
Check the entire inscription for consistency and make any final adjustments before proceeding to finishing steps.
Tips for Beginners
Start Small and Simple
Your first carving project should focus on basic techniques rather than complex designs. Practice on a small piece of soft stone using simple, sans-serif letters. This approach allows you to learn tool handling without the pressure of creating a finished piece.
Choose single words or short phrases for initial projects. Long inscriptions multiply the opportunities for errors and can become overwhelming for new carvers. Master the basics before attempting ambitious designs.
Practice Tool Control
Spend time learning proper tool angles and cutting techniques before starting your main project. Practice making straight cuts, curves, and various depths on scrap stone. This preparation prevents mistakes on your actual carving.
Learn to read the stone as you work. Different areas may respond differently to the same cutting technique due to variations in hardness or grain structure. Adjust your approach accordingly.
Maintain Sharp Tools
Dull tools make carving unnecessarily difficult and dangerous. Learn basic sharpening techniques and maintain your chisels regularly. Sharp tools require less force and provide better control over cutting depth and direction.
Invest in quality tools that will hold an edge well. Cheap chisels often frustrate beginners with poor performance and frequent sharpening requirements.
Take Breaks
Stone carving is physically demanding work that requires sustained concentration. Take regular breaks to prevent fatigue-related mistakes and avoid repetitive strain injuries. Fresh eyes often spot problems that tired ones miss.
Step back frequently to evaluate your progress from different viewing angles. What looks good up close may need adjustment when viewed from normal reading distance.
Design Considerations
Letter Spacing and Proportions
Proper spacing creates readable, attractive inscriptions that enhance the stone’s appearance. Letters should be spaced so they appear evenly distributed when viewed from the intended reading distance. This often means closer spacing for rounded letters and wider spacing for straight-sided characters.
Consider the relationship between letter height and carving depth. Deeper cuts create more dramatic shadows but require more skill to execute cleanly. Shallow cuts suit detailed work but may lack visual impact from a distance.
Plan for consistent baseline alignment across the entire inscription. Minor variations become obvious in finished work and detract from the professional appearance.
Font Selection
Choose fonts that complement both the stone’s character and the inscription’s purpose. Traditional serif fonts work well for formal memorials and historical reproductions. Clean, modern sans-serif designs suit contemporary applications.
Avoid overly decorative fonts that may be difficult to carve or read. Remember that carved letters will be viewed under varying lighting conditions, so clarity should take precedence over ornamentation.
Consider how the chosen font will look at the intended scale. Some typefaces that appear elegant in print become difficult to carve or read when reduced to small sizes in stone.
Compositional Balance
Plan the overall layout to create visual balance across the stone’s surface. Center short inscriptions for formal symmetry, or use asymmetrical arrangements for more dynamic compositions.
Consider the relationship between text and available space. Cramped layouts appear cluttered, while excessive spacing can make inscriptions feel disconnected from their stone support.
Include appropriate margins around the text area. These borders frame the inscription and prevent letters from appearing to run off the stone’s edges.
Finishing Techniques
Surface Treatments
The final surface treatment significantly affects both appearance and durability. Smooth, polished surfaces highlight fine details but may be difficult to read under certain lighting conditions. Textured finishes provide better contrast but may collect dirt over time.
For limestone and sandstone, light sanding followed by sealing helps protect against weathering. Use appropriate stone sealers that allow moisture to escape while preventing water penetration.
Granite can be polished to a high shine using progressively finer abrasives. This process requires patience but creates stunning results that highlight the stone’s natural beauty.
Paint and Gilding
Traditional paint filling makes letters more visible and adds color contrast. Use high-quality paints designed for exterior stone applications. Apply paint carefully with small brushes, removing excess from surrounding areas before it dries.
Gold leaf creates elegant, formal inscriptions suitable for important memorials. The application process requires specific techniques and materials but produces unmatched richness and longevity.
Consider the maintenance requirements of different finishing options. Some treatments require periodic renewal to maintain their appearance.
Protective Measures
Apply appropriate sealers to protect carved surfaces from weathering and staining. Different stone types require specific sealer formulations. Test any treatment on a hidden area first to ensure compatibility.
Plan for proper drainage around outdoor installations to prevent water pooling and freeze damage. Slight forward tilting helps shed water from horizontal surfaces.
Safety Precautions
Personal Protection
Stone carving generates dust that can cause serious respiratory problems over time. Always wear appropriate dust masks or respirators when carving, especially when using power tools. Ensure adequate ventilation in workshop areas.
Protect your eyes from flying stone chips with safety glasses or face shields. Even small fragments can cause serious injury when propelled by chisel strikes or power tool operation.
Wear sturdy gloves to protect hands from cuts and reduce vibration exposure when using power tools. However, remove gloves when precision is required, as they can reduce tool control.
Tool Safety
Keep cutting tools sharp and properly maintained. Dull tools require more force and are more likely to slip unexpectedly. Store chisels with protective covers to prevent damage and injury.
Use mallets and hammers appropriate to the task. Oversized tools can cause loss of control, while undersized ones require excessive force. Match tool weight to your strength and experience level.
Secure work pieces properly before carving. Use clamps, vises, or sandbags to prevent movement during cutting operations. Moving stones can cause tool deflection and injury.
Workshop Environment
Maintain a clean, well-organized workspace to prevent accidents. Remove stone chips and dust regularly to avoid slip hazards. Provide adequate lighting for detailed work.
Store tools properly when not in use. Sharp chisels left on work surfaces create serious cut hazards. Use tool racks or magnetic holders to keep implements organized and safely positioned.
Keep first aid supplies readily available for treating minor cuts and injuries. Know the location of the nearest medical facility for more serious incidents.
Frequently Asked Questions
What type of stone is best for beginners?
Limestone offers the ideal combination of workability and availability for new carvers. It cuts easily with standard tools, forgives minor mistakes, and provides good results with basic techniques. Avoid very hard stones like granite until you’ve developed proper tool skills and technique.
How long does it take to carve letters in stone?
The time required varies greatly depending on stone type, letter size, and carver experience. A beginner might spend 30-60 minutes per letter in limestone, while experienced carvers work much faster. Hard stones like granite require significantly more time per letter.
Can I carve stone without power tools?
Absolutely. Traditional hand carving produces excellent results and offers better control for detailed work. Power tools speed up rough work but aren’t necessary for most projects. Many carvers prefer hand tools for their quiet operation and precise control.
How deep should letters be carved?
Letter depth typically ranges from 1/8 to 1/4 inch for most applications. Deeper carving creates more dramatic shadows but requires more skill. Consider viewing distance, stone type, and intended use when determining appropriate depth.
What’s the best way to transfer designs to stone?
Carbon paper provides the most accurate transfer method for detailed designs. Create paper templates for simple layouts, or draw directly on the stone with pencil or chalk. Avoid permanent markers that may bleed into porous stones.
How do I prevent letters from breaking out at the edges?
Work from the outside edges toward the center of each letter to minimize edge breakout. Keep tools sharp and use light, controlled cuts rather than heavy strikes. Some stones naturally chip more than others, requiring extra care during cutting.
Transform Stone Into Lasting Art
Stone letter carving connects you to an ancient tradition while creating permanent works of art and memory. The techniques outlined in this guide provide the foundation for developing this rewarding skill, whether for personal expression, memorial work, or artistic exploration.
Success in stone carving comes through practice, patience, and respect for both the material and the craft. Start with simple projects using soft stones and basic tools. Focus on developing proper technique before attempting complex designs or challenging materials.
Remember that every master carver started as a beginner. Your first attempts may not match your vision, but each project builds skills and understanding. The permanence of stone means your work will endure long after you’ve mastered the craft, creating a lasting legacy of your artistic journey.
Begin with the fundamentals covered in this guide, and gradually expand your skills and ambitions. The stone is waiting for your vision to bring it to life.